By Edward F. Brewer
Ansco, Binghamton, New York
 The general rules for good reflex camera use and operation, as well as construction features unique to cameras of this type, are outlined in relation to the only American-made automatic reflex camera.
A good camera is simply a good tool. With it you make pictures and if it is a precision instrument you make them easily, limited only to your ability. Setting lens apertures and shutter speeds, focusing, composing the picture and advancing the film, all become smooth, simple automatic operations.
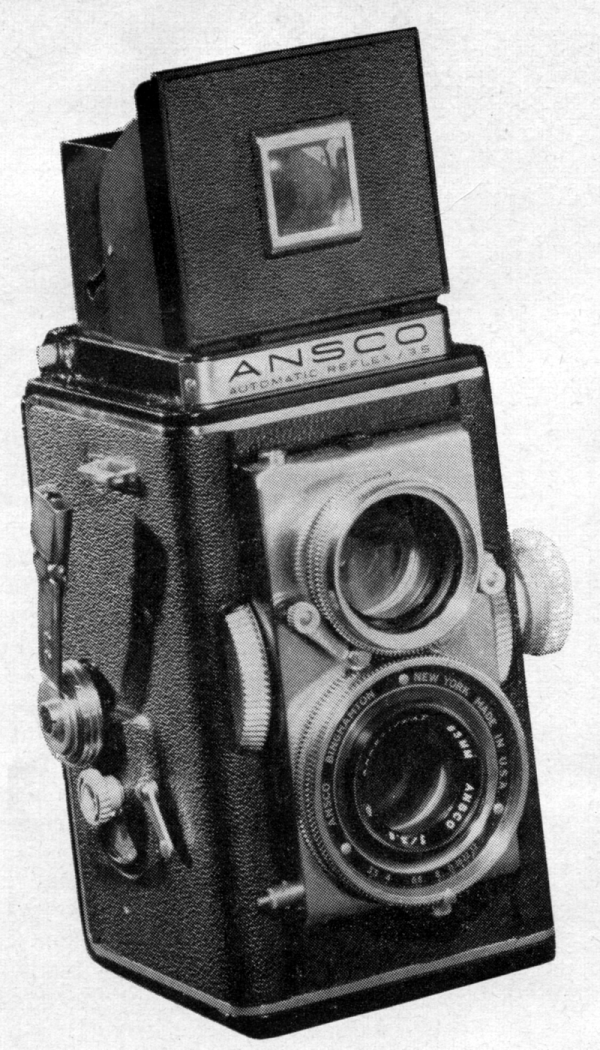
The Ansco Automatic Reflex has been designed and built to meet these ideals of a good tool; it is a precision photographic instrument.
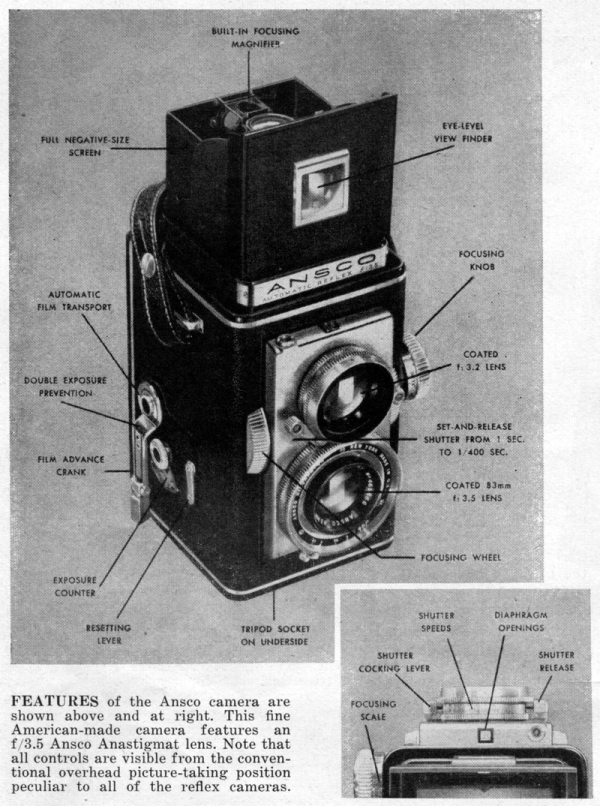
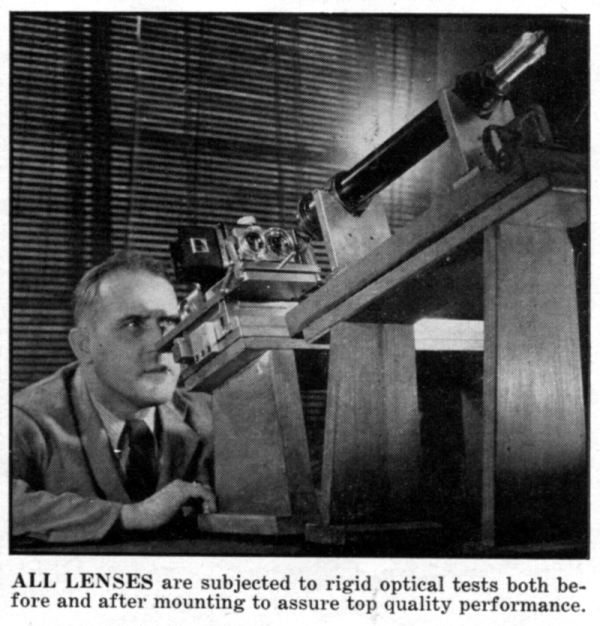
 Optical elements of the highest quality are used in the lenses. The taking lens of the Ansco Reflex is an f/3.5 coated Ansco anastigmat; the finder lens is a matched f/3.2 lens which is also coated. Both of these lenses are thoroughly tested before and after mounting. They are excellent for both black and white work and the exacting demands of color photography.
The shutter is a precision set-and-release type which gives accurately measured exposures from one full second to 1/400 and Bulb. The shutter cable release socket placed on the top of the lens panel is connected by direct drive to the trigger lever within the shutter. Internal flash synchronization enables exposures with SM and SF type lamps as well as the standard wire-filled lamps.
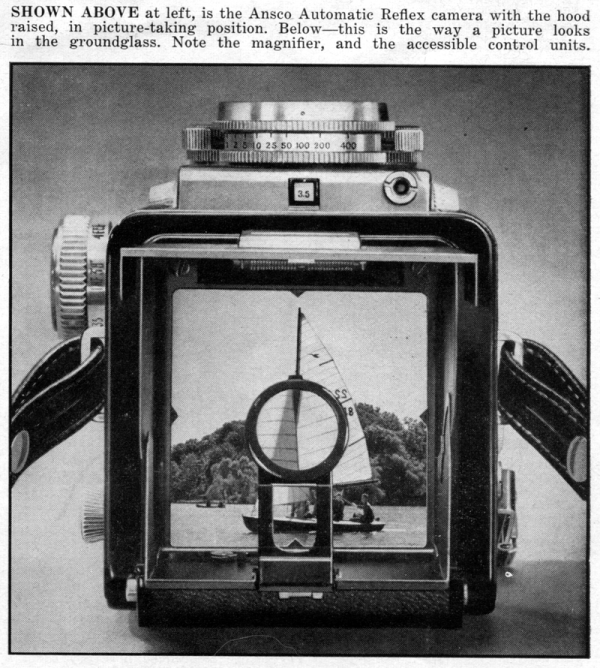
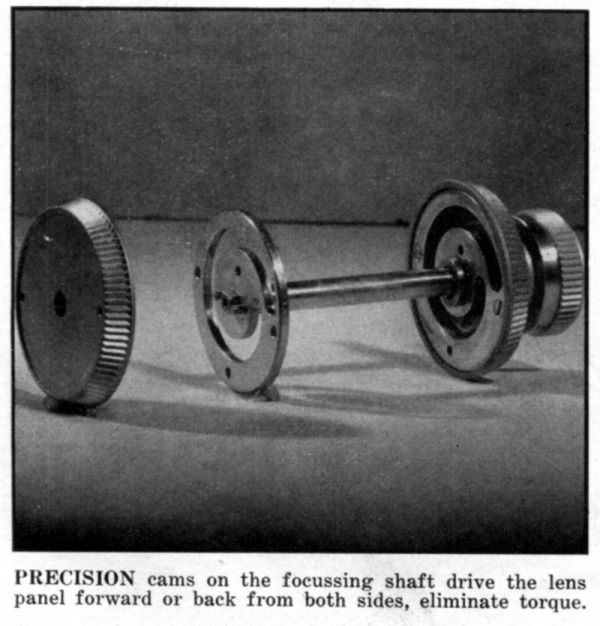
The front lens panel is focused by rotating the knurled knob at the left side of the camera or by rotating one of the fingertip focusing wheels. These are located at each side of the front lens panel for easy fingertip focusing with either one or both hands. Conventional focusing is accomplished by examining the image on the ground glass screen or by using the footage scale which is adjacent to the focusing knob. The ground glass screen is protected from stray light by a self-erecting hood which has a built-in magnifier for hairline focusing. In addition to the full negative size focusing screen, the front and back panels of the hood contain a high quality, eye level view finder. Convenience in operation is assured since the hood may be opened or closed by the pressure of a single finger at one point.
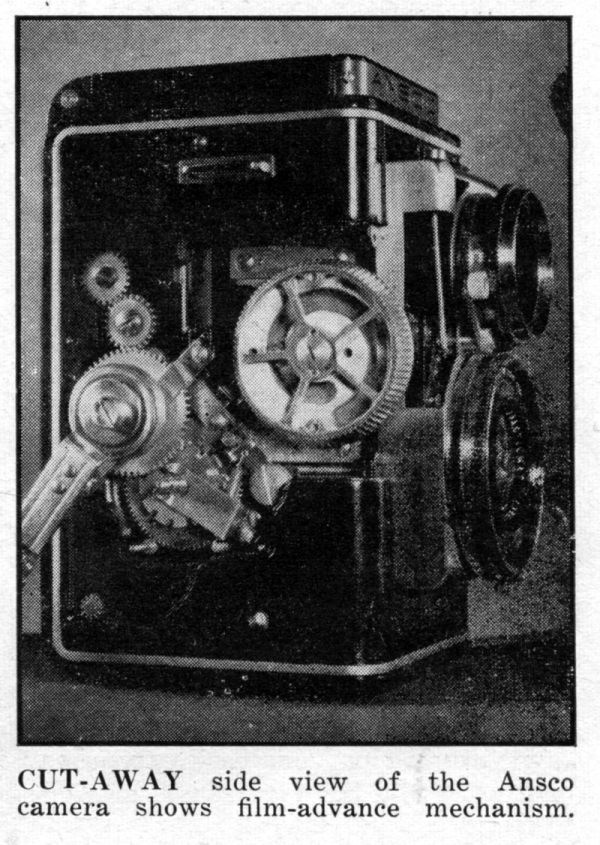 One of the most important features of the Reflex is its automatic film transport mechanism. The mechanism is coupled with an exposure counter plus positive double exposure prevention. A half turn of the folding crank on the right side of the camera advances the film exactly one frame, at the same time releasing the double exposure prevention device.
As the film is advanced, an automatic exposure counter brings the number of the coming exposure into view under a transparent plastic plate next to the film advance crank. All mechanism is under cover and sealed off from the damaging effects of dust and grit.
 One of the outstanding features of the camera lies in a small lever on the right side of the camera adjacent to the exposure counter. If multiple exposures are desired on one frame, simply push this small lever to release the double exposure prevention device.
The final test of any camera, of course, is its actual performance when taking pictures. A convenience that is quickly noticed when you hold the Ansco Reflex in the conventional picture taking position is that all the controls are visible. The shutter speed settings are engraved around the top of the taking lens mount while the lens aperture automatically appears in the small window at the top of the lens panel. This makes it easy for the photographer to focus, compose and check his shutter and aperture settings all without moving the camera from the normal operating position.
 The convenience and simplicity of finding the subject, focusing, and composing the picture through the reflex finder will result in the camera’s being used in this fashion for most exposures. The eye level view finder, however, will be most convenient for photographing fast moving objects, making “rapid fire” shots, taking flash pictures, and for exposures when a higher viewpoint is desired.
When taking a picture with this view finder, the camera must first be focused by using either the ground glass or by estimating the footage and setting the indicator on the focusing knob. The f/3.5 Ansco Anastigmat lens has plenty of depth of field, and many photographers will take advantage of this fact when using the eye level view finder. For example, with the lens set at f/16, and the footage indicator at 15 feet, everything is in focus from 8 feet to 128 feet — an entirely acceptable range for a large majority of picture taking requirements. An engraved depth of field scale is an added picture-taking help.
 The two portrait lenses furnished in the accessories set extend the focusing range of the camera to considerably shorter distances than the basic limitation imposed by the structural size of the camera. With the Ansco Portrait Lens 1 objects as close as 20 1/2 inches can be brought into focus, and with the Ansco Portrait Lens 2 the working range is extended down to 13 1/2 inches. In using these portrait lenses the lens is placed in the adapter ring and slit inside the rim of the viewing lens mount. Focusing and composing can then be accomplished on the ground glass viewing lens; the portrait lens is removed from the viewing lens and slipped over the outside of the taking lens mount for the exposure.
A few words of warning are in order however, regarding the use of portrait lenses. First of all, shallow depth of field is inherent when working at short distances. This can be quickly seen when a portrait lens is placed over the viewing lens. Remember however, that the viewing lens is always wide open and this presents a narrower depth of field than the taking lens will give when stopped down to an appropriate smaller aperture. Correction for this lack of depth of field, of course, is obtained by stopping down the taking lens to the smallest possible aperture that is consistent with other requirements. In general, a range of f/11 to f/16 should be used with the Ansco Portrait Lens 1 and a range of f/16 to f/22 for the #2.
 Remember, also that the viewing lens and the taking lens are not in exactly the same position and that because of this the image formed by the taking lens is not exactly the same as that seen through the viewing lens. In taking pictures at distances of about 4 feet or more, this difference in parallax is so minute as to be of no importance. However, at extremely short range, its effect does become noticeable. For this reason, particularly, when working at extremely close range, pictures should be composed on the viewer ground glass so that the subject is close to the bottom of the picture. The taking lens being at a lower level than the viewing lens, will make up for this crowding at the bottom because of its lower position.
Brewer, Edward F. “How To Use a Reflex Camera.” U.S. Camera Aug. 1951: 71–72. Print.